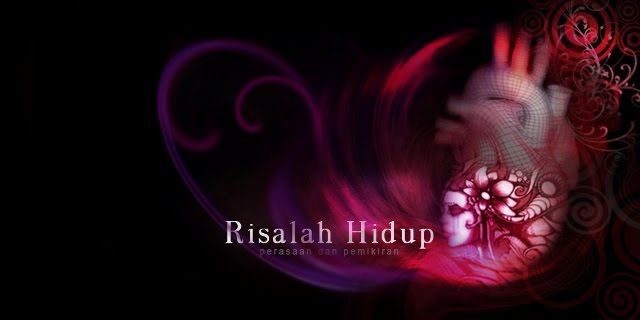

Ni hasil artwork yg kte akan try
Kalau boleh dlm tutorial ni mng xnak gune muke sy je
nnt u all boring pulak. Hehe
Tutorial kali ni sy lebihkn pada brushes and layers ok! ^^

Avril Lavigne. She's rock and adorable.
I love her :)

Background utk design kali ni

Mcm mane kte combine these pictures into one piece that we called artwork!

1. Filters> Gaussian Blur the BG layer
2. Gambar avril ( Layer1 ), cut dari gambar asal
These two steps are actually same mcm tutorial sebelum ni. Macam mane nak buat BG dan mengasingkn gambar dr gambar asal.

Cut bahagian yang telah mempunyai layer yg bertindih supaya subject lebih jelas.
Using Lasso Tool, select part yang ingin di 'cut'. Make sure layer yg betul iatu Layer BG n bkn Layer1.
Kalau silap, korang maybe akan cut kepala avril nnt. -_-''
Then, the next step..
Toolbar> Select> Modify> Feather
Radius: 50pixel
click ok> press Del key
utk lihat hasilnya

Ini hasilnya bile dah cut part yang menyebabkan Layer1 nampak blurry.
Iatu di bahagian center of avril's face.

Korang boleh nampak jelas comparison before n after step ni dilakukan :)

Open new layer,
pastikan layer ni di bawah layer1. As shown
Using brush yg downloaded kat link yg sy ade bg b4.. click kat part yg korang nak
Brush: Devil Splatter

Kat sini pun boleh letak gak corak dr Brush Devil Splatter

Open new layer, Duplicate BG layer n letakkan layer ini di list plg atas. Lihat gambar.

Untuk jadikan begini, gunakan layer yg sama..
toolbar> Filter> Render> Difference clouds

Di Layers Box, choose Overlay

Lihat gambar dengan teliti..
pastikan susunan layer mengikut list yg betul
kemudian, right-click mouse dan click Create Clipping Mask pada Layer1
dan select Lighten pada Layers Box

Open new layer,
choose Brush dr Tool Pallete
Brush: Mehrdadesign

Once again, Lihat susunan layers
Create Clipping Mask pada layer brush td

Ini ulangkaji. Mcm mane korang nak bt swirl ni?
still xtaw? its ok, bleh tgk tutorial yg sebelum ni ok.. dont worry :)

Siap ^^

For extra, u can also try gune Filter> Paint Daubs
or other artist effects utk cantikkan lg design korang

Ni sy gune Paint Daubs :)
Ini pun actually basic sangat.. Klau tgk mat saleh pny design, mmg rase mcm xhabis2 lagi kne belajar.
Sy pn beginner, same mcm u all. so ape2 yg korang dapat kat web ke share la ngan sy jugak! :)


MAKING NICE SWIRLS
Hye!we meet again here. Im so excited to share this tutorial. :)
I really hope u guys are excited to explore lots of photoshop applications. From these applications, you'll find variety ways to design and create as much as your mind wants to!^_^
JOM START!

This is actually step paling basic nak buat
background(BG) yg ade tone warna.
1st, fill the BG layer with black. 2nd, select tool brush from tools pallete n select blue colour.
randomly brush the center of the BG layer. Macam kat gambar k.

To get a smoother colour tone, go to
Toolbar> Filter> Blur> Gaussian Blur
Change Radius ikut kesesuaian Blur

Step ni kte dah mule nak buat swirl.
Dalam Photoshop, elemen paling penting is the layers.
Macam mane nak buat layer?
As u can see in the picture, click New Layer icon> Layer 1
akan automatically appear kt Layer Box

Untuk buat line, select Rectangle Tool, kemudian pilih warna untuk bentuk ni.

Menjadikan line tadi kepada swirl pula,
Toolbar> Filter> Distort> Twirl
Change the angle untuk mendapatkan swirl yang diingini :)
Click OK

This is the result for 1st swirl

Ini pulak macam mane nak create the 2nd swirl,
duplicate the 1st Layer
by right-click mouse and select Duplicate Layer.

U'll see Layer 2 on the Layer Box list as circled. Click Layer 2.
Move the swirl to upperside.
Macam dalam gambar.

Change the swirl structure using Free Transform and Wrap Modes Tool.
Click the icon, and u can experiment this tool until the swirl fits your design.

Like This! :)

Ulang semula step-step awal tadi untuk membuat the 3rd swirl

Ini pun guna Filter> Distort> Twirl

Ini pulak gune ape?
ulangkaji ni! :) Hehe

Ok. Ni step baru.
Erase lebihan swirl yang tidak diperlukan dalam design dengan
menggunakan Eraser from Tools Pallete

Swirl yang seterusnya, just duplicate layer macam sy terangkan
awal - awal tadi. Gune Move Tool utk ubah kedudukan swirl sampai dapat
susunan yg u all suke k! :)

Sy harap tutorial ini akan menyenangkan korang untuk try Photoshop. Paling penting, korang kene rajin2 explore. Bile dah taw sume application, korang sure xpening lagi tgk tutorial kat mane pun. Good Luck! ^_^
